# haco
**Repository Path**: gladys_1/haco
## Basic Information
- **Project Name**: haco
- **Description**: No description available
- **Primary Language**: Unknown
- **License**: Not specified
- **Default Branch**: gladys-25
- **Homepage**: None
- **GVP Project**: No
## Statistics
- **Stars**: 0
- **Forks**: 0
- **Created**: 2024-10-31
- **Last Updated**: 2024-11-04
## Categories & Tags
**Categories**: Uncategorized
**Tags**: None
## README
# `haco` Home Assistant Control Objects
`haco` is a Home Assistant Add-On, and associated Tasmota daemon written in Berry, to greatly simplify the process of
exposing Home
Assistant controls (e.g. Pull-down Lists, Number Sliders, Sensors, etc.) from a Tasmota device - and handling the
communication between both sides.
Using `haco` to expose, for example, a "Restart Tasmota" button to Home Assistant is as simple as writing the following
Python code:
```py
from haco import Button, Tasmota
restart = Button('Restart Tasmota', icon='restart')
@restart.callback()
def ha(value) -> Tasmota[str, 'tasmota.cmd("restart 1")']:
return value
```
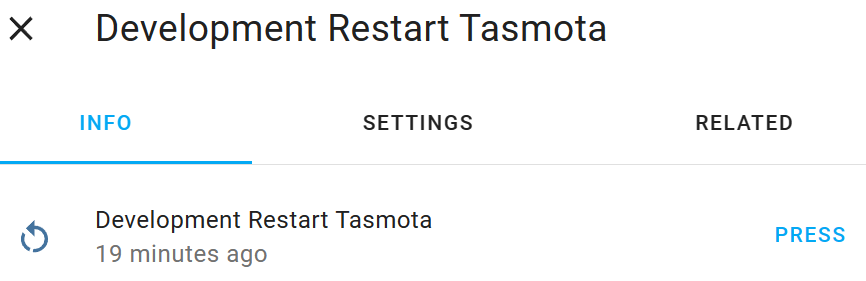
A fully functional restart button will now appear associated with the device in Home Assistant:
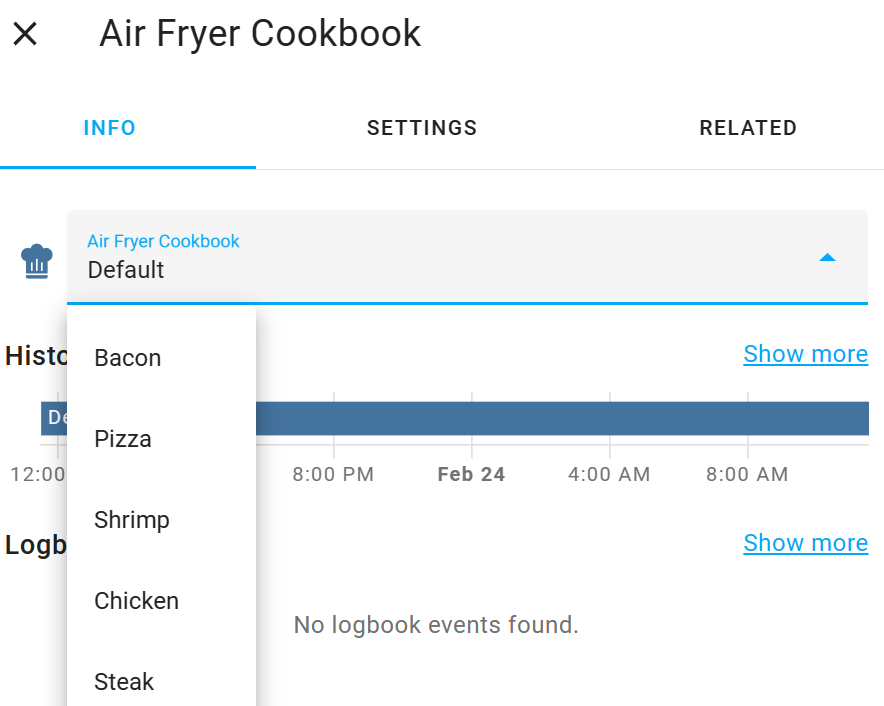
 Or, more practically, a cookbook pull-down menu, for a Tuya air fryer, might look like this:
```py
OPTIONS = ['Default', 'Fries', 'Shrimp', 'Pizza', 'Chicken', 'Fish', 'Steak', 'Cake', 'Bacon', 'Preheat', 'Custom']
cookbook = Select('Cookbook', options=OPTIONS, icon='chef-hat')
@cookbook.callback()
def ha(value: str) -> Tasmota[int, tuya.send(4, 3)]:
return OPTIONS.index(value)
@cookbook.callback(trigger=tuya.received(4, 3))
def tasmota(value: int):
return OPTIONS[value]
```
Or, more practically, a cookbook pull-down menu, for a Tuya air fryer, might look like this:
```py
OPTIONS = ['Default', 'Fries', 'Shrimp', 'Pizza', 'Chicken', 'Fish', 'Steak', 'Cake', 'Bacon', 'Preheat', 'Custom']
cookbook = Select('Cookbook', options=OPTIONS, icon='chef-hat')
@cookbook.callback()
def ha(value: str) -> Tasmota[int, tuya.send(4, 3)]:
return OPTIONS.index(value)
@cookbook.callback(trigger=tuya.received(4, 3))
def tasmota(value: int):
return OPTIONS[value]
```
 ## Do I Need This? Can't I Do this with Native Tasmota?
You certainly can.
But in my experience, the process is so fiddly, error-prone and hard to maintain that it's enough to
deter the casual user (as I am) entirely. Plus, sharing your configuration, once you've finally got it working, can mean
complex step-by-step guides, setting up triggers, finding MAC addresses and topics (in Tasmota) - and numerous
Blueprints, Helpers and Templates (on the Home Assistant side).
You can see how much work creating such guides involves by seeing how it
was [heroically undertaken by Blakadder](https://blakadder.com/proscenic-in-home-assistant/), as
compared with
the [full `haco`-based equivalent](https://github.com/fmtr/haco/blob/release/haco/configs/proscenic_t21.py).
With `haco`, on the other hand, the thorny parts of the initial setup are abstracted away and your final configuration
can often be shared via a single script. Below is a list of some of the tasks that `haco`
handles for you:
* Announcing the entity via MQTT to Home Assistant
* Generating MQTT/HA-friendly unique IDs
* Associating the entity with its parent device
* Subscribing and publishing to the relevant MQTT topics
* Managing the relevant Tasmota rules
* Appropriate serialization of data
* Translating Home Assistant messages to their to appropriate Berry data types, and vice versa
## Pre-Release
:warning: This library is currently in a pre-release state. The configuration format is likely to change, and
only `Sensor`, `Select`, `Button`, `Number`, `BinarySensor`, `Switch`, `Text`, `Update`, `Fan`
and `Climate` entities are currently implemented.
## Installation
Installation involves installing two parts: the Tasmota daemon and the Home Assistant Add-On. Both are fairly simple.
### Tasmota
I'd advise first using a guinea pig Tasmota device to get `haco` up and running. The device needs to have MQTT
connected and be available to Home Assistant (i.e. showing up
in [the Devices section](https://my.home-assistant.io/redirect/devices/)).
Once your test device is ready, with a recent (12.5+) version of Tasmota, simply paste the following into your Tasmota
Berry Script Console:
```be
{"download":tasmota.urlfetch('https://fmtr.link/haco/tapp','haco.tapp'), "restart":tasmota.cmd("restart 1")}
```
You should see output like `{'restart': {'Restart': 'Restarting'}, 'download': 200}` and the device will restart.
Once the device restarts, you should see the following among your Tasmota startup logs (in the regular console, not the
Berry one):
```
HACO: The haco daemon has started. Hostname: tasmota-test, MAC: 04:74:77:9B:CB:CC. Listening for configuration...
```
#### Older Tasmota Versions
With older Tasmota versions, download the [`haco.tapp` file](https://fmtr.link/haco/tapp) on a desktop
computer,
upload it to your device and restart manually.
### Home Assistant
You can now install the Home Assistant Add-On:
[](https://fmtr.link/haco/add-on)
Once the Add-On is installed, click into its Configuration tab and you'll see a setting called `assignments`:
```yaml
- config: null
identifier: null
```
#### Assigning a configuration module to a device
Now we're ready to assign a configuration module to our Tasmota device. For now, we can use a built-in test
module `test`. The `identifer` value should be the hostname (or MAC) of your Tasmota device. So for our example it
should look like this:
```yaml
- config: test
identifier: tasmota-test # Hostname of Tasmota device
```
Saving the Configuration will restart the Add-On. After the restart, you should see the following in the Add-On logs:
```
Device "Tasmota Test Device" successfully configured. Hostname: tasmota-test MAC: 04:74:77:9B:CB:CC.
```
In Home Assistant, find the device in [the Devices section](https://my.home-assistant.io/redirect/devices/). You should
now see a test Select (pulldown) control called "Greeter".
## Do I Need This? Can't I Do this with Native Tasmota?
You certainly can.
But in my experience, the process is so fiddly, error-prone and hard to maintain that it's enough to
deter the casual user (as I am) entirely. Plus, sharing your configuration, once you've finally got it working, can mean
complex step-by-step guides, setting up triggers, finding MAC addresses and topics (in Tasmota) - and numerous
Blueprints, Helpers and Templates (on the Home Assistant side).
You can see how much work creating such guides involves by seeing how it
was [heroically undertaken by Blakadder](https://blakadder.com/proscenic-in-home-assistant/), as
compared with
the [full `haco`-based equivalent](https://github.com/fmtr/haco/blob/release/haco/configs/proscenic_t21.py).
With `haco`, on the other hand, the thorny parts of the initial setup are abstracted away and your final configuration
can often be shared via a single script. Below is a list of some of the tasks that `haco`
handles for you:
* Announcing the entity via MQTT to Home Assistant
* Generating MQTT/HA-friendly unique IDs
* Associating the entity with its parent device
* Subscribing and publishing to the relevant MQTT topics
* Managing the relevant Tasmota rules
* Appropriate serialization of data
* Translating Home Assistant messages to their to appropriate Berry data types, and vice versa
## Pre-Release
:warning: This library is currently in a pre-release state. The configuration format is likely to change, and
only `Sensor`, `Select`, `Button`, `Number`, `BinarySensor`, `Switch`, `Text`, `Update`, `Fan`
and `Climate` entities are currently implemented.
## Installation
Installation involves installing two parts: the Tasmota daemon and the Home Assistant Add-On. Both are fairly simple.
### Tasmota
I'd advise first using a guinea pig Tasmota device to get `haco` up and running. The device needs to have MQTT
connected and be available to Home Assistant (i.e. showing up
in [the Devices section](https://my.home-assistant.io/redirect/devices/)).
Once your test device is ready, with a recent (12.5+) version of Tasmota, simply paste the following into your Tasmota
Berry Script Console:
```be
{"download":tasmota.urlfetch('https://fmtr.link/haco/tapp','haco.tapp'), "restart":tasmota.cmd("restart 1")}
```
You should see output like `{'restart': {'Restart': 'Restarting'}, 'download': 200}` and the device will restart.
Once the device restarts, you should see the following among your Tasmota startup logs (in the regular console, not the
Berry one):
```
HACO: The haco daemon has started. Hostname: tasmota-test, MAC: 04:74:77:9B:CB:CC. Listening for configuration...
```
#### Older Tasmota Versions
With older Tasmota versions, download the [`haco.tapp` file](https://fmtr.link/haco/tapp) on a desktop
computer,
upload it to your device and restart manually.
### Home Assistant
You can now install the Home Assistant Add-On:
[](https://fmtr.link/haco/add-on)
Once the Add-On is installed, click into its Configuration tab and you'll see a setting called `assignments`:
```yaml
- config: null
identifier: null
```
#### Assigning a configuration module to a device
Now we're ready to assign a configuration module to our Tasmota device. For now, we can use a built-in test
module `test`. The `identifer` value should be the hostname (or MAC) of your Tasmota device. So for our example it
should look like this:
```yaml
- config: test
identifier: tasmota-test # Hostname of Tasmota device
```
Saving the Configuration will restart the Add-On. After the restart, you should see the following in the Add-On logs:
```
Device "Tasmota Test Device" successfully configured. Hostname: tasmota-test MAC: 04:74:77:9B:CB:CC.
```
In Home Assistant, find the device in [the Devices section](https://my.home-assistant.io/redirect/devices/). You should
now see a test Select (pulldown) control called "Greeter".
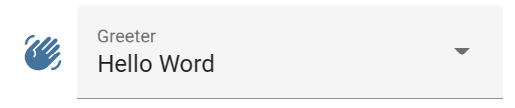 Selecting the greetings from the pulldown, you should see them appear in your Tasmota Berry console, e.g.
```console
haco says: Hello World!
```
This means `haco` is set up and working properly. Good! You can now use `haco` to assign configuration modules to your
Tasmota devices.
## Configuration Modules
Configuration modules are a little like drivers, that tell `haco` how to communicate with a Tasmota device, what
controls to expose to Home Assistant, etc.
So far we've only used the `test` configuration module, that exposed the Greeter pulldown, but to control
real-world devices, you'll need to assign them to a module written specifically for that device. There are currently two
types of modules,
Built-In and User-Defined.
Whichever type you use, assigning them to a device is done as we saw above.
### Built-In Modules
`haco` ships with a small number of built-in configurations. These can be found in
the [configs directory](https://github.com/fmtr/haco/blob/release/haco/configs) in this repo. But in the likely event
that your device hasn't already
been added, you'll need to define your own.
:information_source: The aim is to expand the number of built-in configurations over time. So if you define your own (
see below), please submit it to this repo as a Pull Request, or raise an Issue linking to your code!
### Creating Your Own Configuration Module
#### General module structure
A configuration module is, ultimately, just a typical Python module. In this case, they contain definitions from one or
more `Control` objects. Each control definition involves two things:
* The control object assigned to a variable, e.g. `temperature_sensor=Sensor(...)`
* Any required callback functions for the control, e.g. `@temperature_sensor.callback(...)`
#### Location
User-Defined modules should be added to the `/config/haco` directory in Home Assistant, with a `.py` extension,
e.g. `/config/haco/my_config.py`.
#### Defining controls
Here are a couple of simple examples to help get you started defining your own configuration module.
##### Tasmota-Only Controls
First, let's define a Tasmota-only sensor to report how much free memory there is on the Tasmota device. This sensor
is "Tasmota-Only" as it only handles values sent _from_ Tasmota (and sends nothing back from Home Assistant).
```python
from haco import Sensor
memory = Sensor('Memory Free', icon='memory', uom=Sensor.UOM.DATA_KILOBYTES, uom_type=Sensor.UOM_TYPE.DATA_SIZE)
@memory.callback(trigger='Tele#Heap')
def tasmota(value: int):
return value
```
Selecting the greetings from the pulldown, you should see them appear in your Tasmota Berry console, e.g.
```console
haco says: Hello World!
```
This means `haco` is set up and working properly. Good! You can now use `haco` to assign configuration modules to your
Tasmota devices.
## Configuration Modules
Configuration modules are a little like drivers, that tell `haco` how to communicate with a Tasmota device, what
controls to expose to Home Assistant, etc.
So far we've only used the `test` configuration module, that exposed the Greeter pulldown, but to control
real-world devices, you'll need to assign them to a module written specifically for that device. There are currently two
types of modules,
Built-In and User-Defined.
Whichever type you use, assigning them to a device is done as we saw above.
### Built-In Modules
`haco` ships with a small number of built-in configurations. These can be found in
the [configs directory](https://github.com/fmtr/haco/blob/release/haco/configs) in this repo. But in the likely event
that your device hasn't already
been added, you'll need to define your own.
:information_source: The aim is to expand the number of built-in configurations over time. So if you define your own (
see below), please submit it to this repo as a Pull Request, or raise an Issue linking to your code!
### Creating Your Own Configuration Module
#### General module structure
A configuration module is, ultimately, just a typical Python module. In this case, they contain definitions from one or
more `Control` objects. Each control definition involves two things:
* The control object assigned to a variable, e.g. `temperature_sensor=Sensor(...)`
* Any required callback functions for the control, e.g. `@temperature_sensor.callback(...)`
#### Location
User-Defined modules should be added to the `/config/haco` directory in Home Assistant, with a `.py` extension,
e.g. `/config/haco/my_config.py`.
#### Defining controls
Here are a couple of simple examples to help get you started defining your own configuration module.
##### Tasmota-Only Controls
First, let's define a Tasmota-only sensor to report how much free memory there is on the Tasmota device. This sensor
is "Tasmota-Only" as it only handles values sent _from_ Tasmota (and sends nothing back from Home Assistant).
```python
from haco import Sensor
memory = Sensor('Memory Free', icon='memory', uom=Sensor.UOM.DATA_KILOBYTES, uom_type=Sensor.UOM_TYPE.DATA_SIZE)
@memory.callback(trigger='Tele#Heap')
def tasmota(value: int):
return value
```
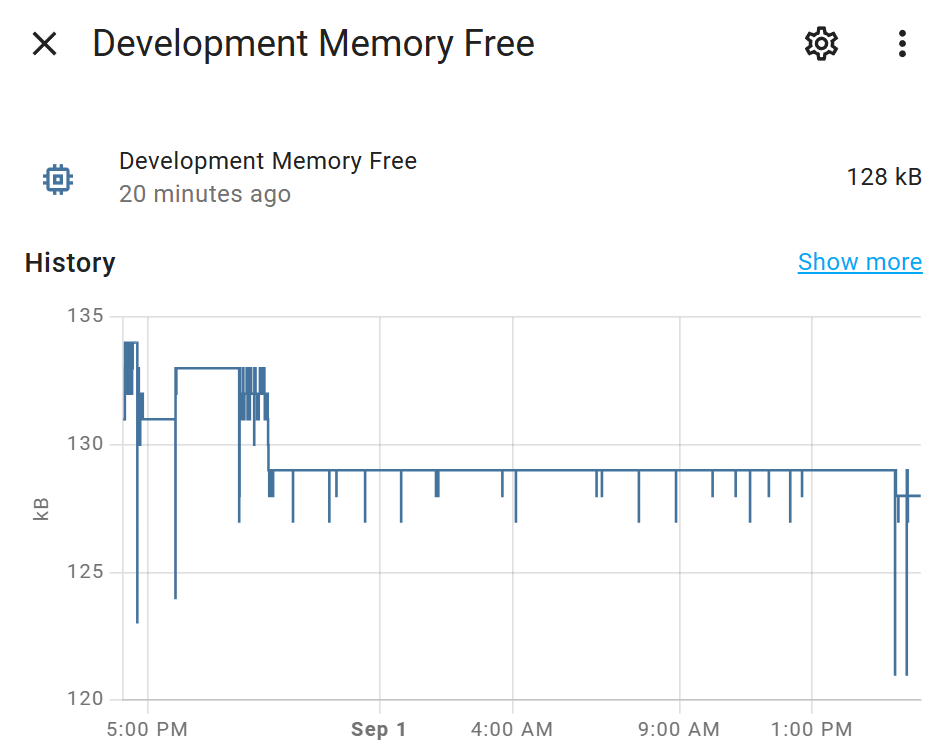 Let's break this control definition down into the control object, the callback decorator, and the callback itself.
###### The control object
First we initialise a `Sensor` control object, assign it to a variable called `memory`, give it a relevant icon, unit of
measure and type.
###### The callback decorator
The callback decorator `@memory.callback(trigger='Tele#Heap')` specifies a Tasmota trigger, the values from which will
be sent to the callback function.
This specific trigger, `Tele#Heap`, fires whenever telemetry data is returned from Tasmota and, specifically, returns
the `Heap` field, which contains the free
memory in kilobytes.
:warning: Tasmota callbacks _must_ have such a `trigger` specified in this decorator.
###### The callback
Note that the callback function is named `tasmota`. This name is important as it tells `haco` that this callback
handles values _from_ Tasmota.
The response from the trigger we specified in our callback decorator above gets fed into our callback as the `value`
argument. The (optional) type annotation for the `value` argument (the `int`) tells `haco` what data type to expect from
Tasmota, and type conversion gets done automatically.
The return value from the function is what will be returned to Home Assistant as the value for the sensor.
:information_source: Note that our callback function does not actually _do_ anything with our `value` other than return
it. But if we wanted to (for example) convert the value from kilobytes to bytes, this is where we'd do it,
with `return value*1000`.
:information_source: You can find the list of available units of measure [here](../../blob/release/haco/data/uom.py) and
types [here](../../blob/main/haco/data/type_sensor.py).
#### Home Assistant-Only Controls
Moving on to the opposite type of control, that is one that only handles values _from_ Home Assistant. The Button
control does
exactly this, as it is triggered by being pressing in Home Assistant, but Tasmota returns nothing to acknowledge that
press.
Here is how to define a `Button` control that, when pressed, restarts the Tasmota device.
```py
from haco import Button, Tasmota
restart = Button('Restart Tasmota', icon='restart')
@restart.callback()
def ha(value) -> Tasmota[str, 'tasmota.cmd("restart 1")']:
return value
```
In the case we define a `Button` control, and again use our decorator to add a callback to handle values _from_ Home
Assistant, which must therefore be named `ha`.
###### The `Tasmota` Type Annotation
The most notable difference with a Home Assistant (`ha`) callback is the `Tasmota` return type annotation. This takes
two arguments, `Tasmota[,]`. The
first argument is the type returned by the callback function, as per usual, and which again lets `haco` convert the
return value accordingly.
The second argument is an expression that defines _what to do_ on the Tasmota side when the button is pressed. In this
case, this
is just a Berry expression to restart Tasmota.
:warning: Note that Home Assistant callbacks _must_ have such a `Tasmota` type annotation for their return type.
:information_source: In the example above, the `value` argument received and returned by our callback is not actually
used by the Berry expression side. Home Assistant just sends a constant string (`PRESS`) when the button is pressed, so
the actual content of
the `value` argument is not important.
#### Two-Way Controls
Two-way controls need to handle values from _both_ Home Assistant and from Tasmota, and hence need both the callbacks
types - `ha` and `tasmota` we've seen above.
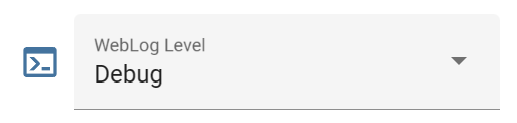
Here is an example two-way `Select` (pulldown menu) object. It allows setting the Tasmota `WebLog` console debugging
level from Home Assistant, and also reflects any changes to that setting made on the Tasmota side.
```python
from haco import Select, Tasmota
LOG_LEVELS = ["None", "Error", "Info", "Debug", "Debug More"]
weblog = Select('WebLog Level', icon='console', options=LOG_LEVELS)
@weblog.callback()
def ha(value) -> Tasmota[str, 'tasmota.cmd("WebLog "+value)']:
return LOG_LEVELS.index(value)
@weblog.callback(trigger='WebLog')
def tasmota(value: int):
return LOG_LEVELS[value]
```
The above is very similar to what we have already seen.
The `ha` callback takes friendly names (e.g. `Error`, `Info`) selected by the user in Home Assistant, and returns them
as their corresponding number values (`WebLog 1`, `WebLog2`) used by Tasmota.
The `tasmota` callback, naturally enough, does the exact opposite, returning the string names to Home Assistant whenever
the `WebLog` command is used on the Tasmota side.
Let's break this control definition down into the control object, the callback decorator, and the callback itself.
###### The control object
First we initialise a `Sensor` control object, assign it to a variable called `memory`, give it a relevant icon, unit of
measure and type.
###### The callback decorator
The callback decorator `@memory.callback(trigger='Tele#Heap')` specifies a Tasmota trigger, the values from which will
be sent to the callback function.
This specific trigger, `Tele#Heap`, fires whenever telemetry data is returned from Tasmota and, specifically, returns
the `Heap` field, which contains the free
memory in kilobytes.
:warning: Tasmota callbacks _must_ have such a `trigger` specified in this decorator.
###### The callback
Note that the callback function is named `tasmota`. This name is important as it tells `haco` that this callback
handles values _from_ Tasmota.
The response from the trigger we specified in our callback decorator above gets fed into our callback as the `value`
argument. The (optional) type annotation for the `value` argument (the `int`) tells `haco` what data type to expect from
Tasmota, and type conversion gets done automatically.
The return value from the function is what will be returned to Home Assistant as the value for the sensor.
:information_source: Note that our callback function does not actually _do_ anything with our `value` other than return
it. But if we wanted to (for example) convert the value from kilobytes to bytes, this is where we'd do it,
with `return value*1000`.
:information_source: You can find the list of available units of measure [here](../../blob/release/haco/data/uom.py) and
types [here](../../blob/main/haco/data/type_sensor.py).
#### Home Assistant-Only Controls
Moving on to the opposite type of control, that is one that only handles values _from_ Home Assistant. The Button
control does
exactly this, as it is triggered by being pressing in Home Assistant, but Tasmota returns nothing to acknowledge that
press.
Here is how to define a `Button` control that, when pressed, restarts the Tasmota device.
```py
from haco import Button, Tasmota
restart = Button('Restart Tasmota', icon='restart')
@restart.callback()
def ha(value) -> Tasmota[str, 'tasmota.cmd("restart 1")']:
return value
```
In the case we define a `Button` control, and again use our decorator to add a callback to handle values _from_ Home
Assistant, which must therefore be named `ha`.
###### The `Tasmota` Type Annotation
The most notable difference with a Home Assistant (`ha`) callback is the `Tasmota` return type annotation. This takes
two arguments, `Tasmota[,]`. The
first argument is the type returned by the callback function, as per usual, and which again lets `haco` convert the
return value accordingly.
The second argument is an expression that defines _what to do_ on the Tasmota side when the button is pressed. In this
case, this
is just a Berry expression to restart Tasmota.
:warning: Note that Home Assistant callbacks _must_ have such a `Tasmota` type annotation for their return type.
:information_source: In the example above, the `value` argument received and returned by our callback is not actually
used by the Berry expression side. Home Assistant just sends a constant string (`PRESS`) when the button is pressed, so
the actual content of
the `value` argument is not important.
#### Two-Way Controls
Two-way controls need to handle values from _both_ Home Assistant and from Tasmota, and hence need both the callbacks
types - `ha` and `tasmota` we've seen above.
Here is an example two-way `Select` (pulldown menu) object. It allows setting the Tasmota `WebLog` console debugging
level from Home Assistant, and also reflects any changes to that setting made on the Tasmota side.
```python
from haco import Select, Tasmota
LOG_LEVELS = ["None", "Error", "Info", "Debug", "Debug More"]
weblog = Select('WebLog Level', icon='console', options=LOG_LEVELS)
@weblog.callback()
def ha(value) -> Tasmota[str, 'tasmota.cmd("WebLog "+value)']:
return LOG_LEVELS.index(value)
@weblog.callback(trigger='WebLog')
def tasmota(value: int):
return LOG_LEVELS[value]
```
The above is very similar to what we have already seen.
The `ha` callback takes friendly names (e.g. `Error`, `Info`) selected by the user in Home Assistant, and returns them
as their corresponding number values (`WebLog 1`, `WebLog2`) used by Tasmota.
The `tasmota` callback, naturally enough, does the exact opposite, returning the string names to Home Assistant whenever
the `WebLog` command is used on the Tasmota side.
 #### Debugging Your Configuration
When you first assign a new configuration to a device, keep an eye on the Add-On logs for any errors. You'll see a
typical Python stack trace if anything goes wrong.
:warning: Each time you edit your configuration module (`.py` file), you'll need to restart the Add-On. Hot
is reloading not yet supported.
#### Additional Capabilities
More complex device controls (e.g. `Climate`, `Fan`) have additional capabilities beyond a single value requiting
Tasmota/Home Assistant
callbacks. Adding callbacks for these extended capabilities is done similarly to the above, only the callbacks need
to include the name of the capability. So if you want to add callbacks around setting the `target_humidity` of
a `Climate` control, you'd need to call your callbacks `target_humidity_tasmota` and `target_humidity_ha`, etc.
A full schema of these names will appear in subsequent documentation. But you can find example implementations for most
controls in the [built-in `development` config](https://github.com/fmtr/haco/tree/release/haco/configs/development.py).
Anway, if you get the names wrong, you'll see an error like this in your Add-On logs:
```
ValueError: Callback function name "set_mode_ha" is not valid for control "Climate". Must be one of: ['action_tasmota', 'current_humidity_tasmota', 'current_temperature_tasmota', 'mode_ha', 'mode_tasmota', 'preset_mode_ha', 'preset_mode_tasmota', 'swing_mode_ha', 'swing_mode_tasmota', 'target_humidity_ha', 'target_humidity_tasmota', 'target_temperature_ha', 'target_temperature_tasmota', 'temperature_high_ha', 'temperature_high_tasmota', 'temperature_low_ha', 'temperature_low_tasmota']
```
#### Additional Resources
Beyond these examples, when creating your own configuration, you'll probably find
the [built-in configurations](https://github.com/fmtr/haco/tree/release/haco/configs) (especially
the [`development` config](https://github.com/fmtr/haco/tree/release/haco/configs/development.py)) useful.
#### Debugging Your Configuration
When you first assign a new configuration to a device, keep an eye on the Add-On logs for any errors. You'll see a
typical Python stack trace if anything goes wrong.
:warning: Each time you edit your configuration module (`.py` file), you'll need to restart the Add-On. Hot
is reloading not yet supported.
#### Additional Capabilities
More complex device controls (e.g. `Climate`, `Fan`) have additional capabilities beyond a single value requiting
Tasmota/Home Assistant
callbacks. Adding callbacks for these extended capabilities is done similarly to the above, only the callbacks need
to include the name of the capability. So if you want to add callbacks around setting the `target_humidity` of
a `Climate` control, you'd need to call your callbacks `target_humidity_tasmota` and `target_humidity_ha`, etc.
A full schema of these names will appear in subsequent documentation. But you can find example implementations for most
controls in the [built-in `development` config](https://github.com/fmtr/haco/tree/release/haco/configs/development.py).
Anway, if you get the names wrong, you'll see an error like this in your Add-On logs:
```
ValueError: Callback function name "set_mode_ha" is not valid for control "Climate". Must be one of: ['action_tasmota', 'current_humidity_tasmota', 'current_temperature_tasmota', 'mode_ha', 'mode_tasmota', 'preset_mode_ha', 'preset_mode_tasmota', 'swing_mode_ha', 'swing_mode_tasmota', 'target_humidity_ha', 'target_humidity_tasmota', 'target_temperature_ha', 'target_temperature_tasmota', 'temperature_high_ha', 'temperature_high_tasmota', 'temperature_low_ha', 'temperature_low_tasmota']
```
#### Additional Resources
Beyond these examples, when creating your own configuration, you'll probably find
the [built-in configurations](https://github.com/fmtr/haco/tree/release/haco/configs) (especially
the [`development` config](https://github.com/fmtr/haco/tree/release/haco/configs/development.py)) useful.